
Sign in to the Panasonic Comfort Cloud App using either your Panasonic ID or your Apple/Google Account. If you already have an Apple/Google account, you can log in directly with your existing credentials.
Alternatively, you can sign in using your existing Panasonic ID or create a new Panasonic ID for new account registration.
If you have both an Apple/Google account and an existing Panasonic ID, enhance convenience by linking your Apple/Google account with your Panasonic ID.
Step 1 Tap "Start"
Step 2 Select "Sign in with Apple" or "Sign in with Google".
Step 3 Sign into your account by entering your ID and password.
Step 4 Select your country and tap "Register"
If you already have the Panasonic ID, tap "Link with my Panasonic ID"*.
If you already have a Panasonic ID and wish to sign in with your Apple/Google account, please ensure that you link the two accounts using either method from:3.0 How to Link the Panasonic ID and Apple/Google Account)
Otherwise, they will be recognized as two separate accounts.
Step 1 Tap "Start"
Step 2 Tap "Create an account"
Step 3 Enter your email address and check the box of "I'm not a robot". Tap "Accept Terms and continue".
Step 4 You will receive the verification code via email.
Step 5 Return to the app, input the verification code, and then tap "Confirm".
Step 6 Set the password and select country. Tap "Register".
Step 7 Select country and enter your mobile phone number. Tap "Send Code".
Step 8 You will receive the verification code via SMS.
Step 9 Return to the app, input the verification code, and then tap "Confirm".
Step 1 Tap "Start"
Step 2 Tap "Create an account"
Step 3 Tap "Phone number"
Step 4 Select country and enter your mobile phone number. Tap "Accept Terms and continue"
Step 5 You will receive the verification code via SMS.
Step 6 Return to the app, input the verification code, and then tap "Confirm".
If you already have a Panasonic ID and wish to sign in with your Apple/Google account, please ensure that you link the two accounts using either method. Otherwise, they will be recognized as two separate accounts.
Here are the two ways to link your accounts:
Step 1 Tap "Start"
Step 2 Sign in with your Panasonic ID.
Step 3 Select country and enter your mobile phone number. Tap "Send Code".
Step 4 You will receive the verification code via SMS.
Step 5 Return to the app, input the verification code, and then tap "Confirm".
Step 6 Tap "Menu" button and select "Account Management".
Step 7 Tap "Register social media account" to link with your Apple/Google account.
Step 1 Tap "Start"
Step 2 Select "Sign in with Apple" or "Sign in with Google".
Step 3 Sign into your account by entering your ID and password.
Step 4 Select "Link with my Panasonic ID".
If you sign in with your Apple/Google account first and forgot to link your Panasonic ID, delete the new account from "Menu" → "Account Management" and then proceed with: 3.1 Link Your Apple or Google Account after Sign-In with Panasonic ID or 3.2 Sign In Using Your Apple/Google Account and Link Your Panasonic ID Simultaneously.
Residential Advanced Built-In Wi-Fi (Easy Connect)
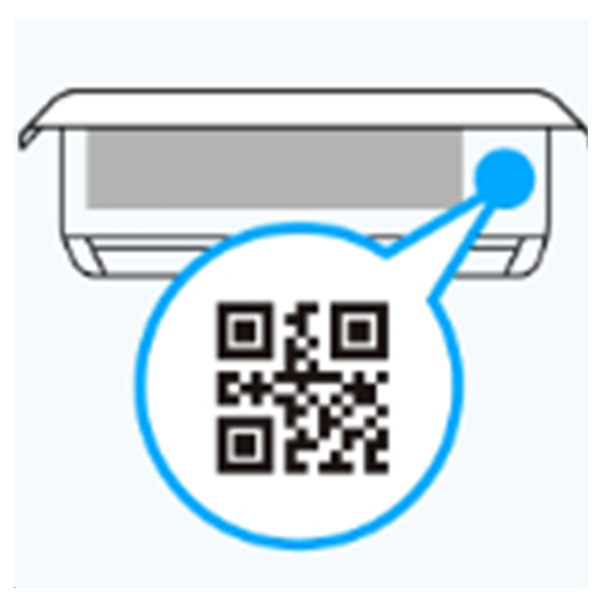
Single QR code inside the front panel
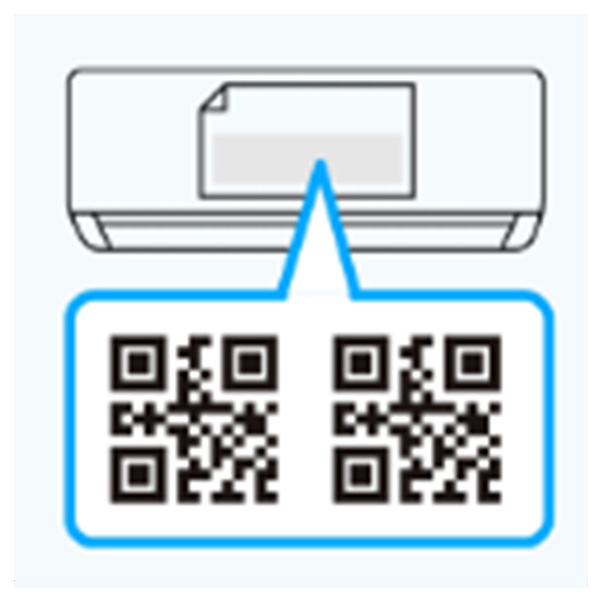
Model with two QR codes on the front panel sticker
① Tap the "+" icon.
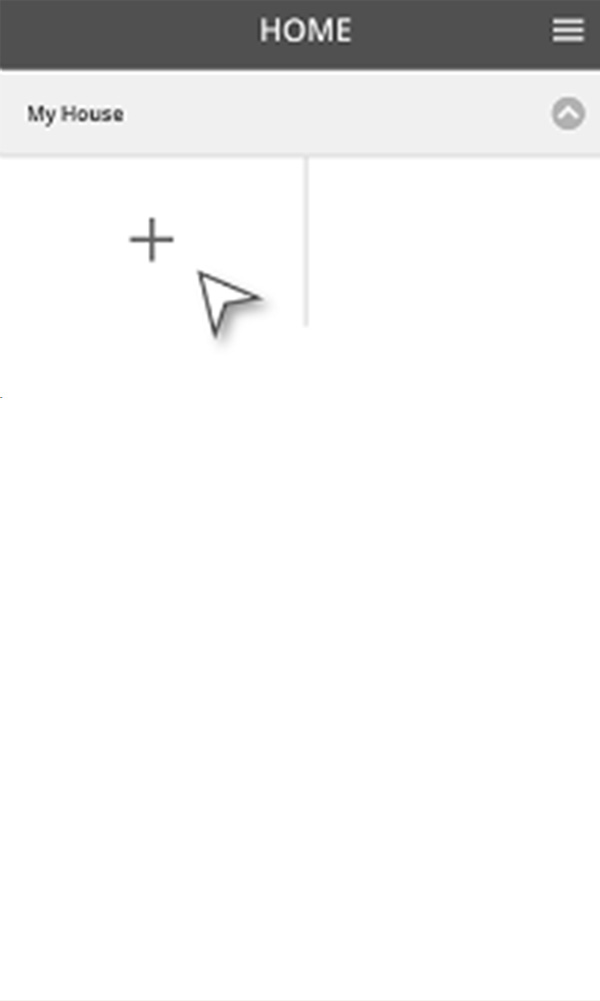
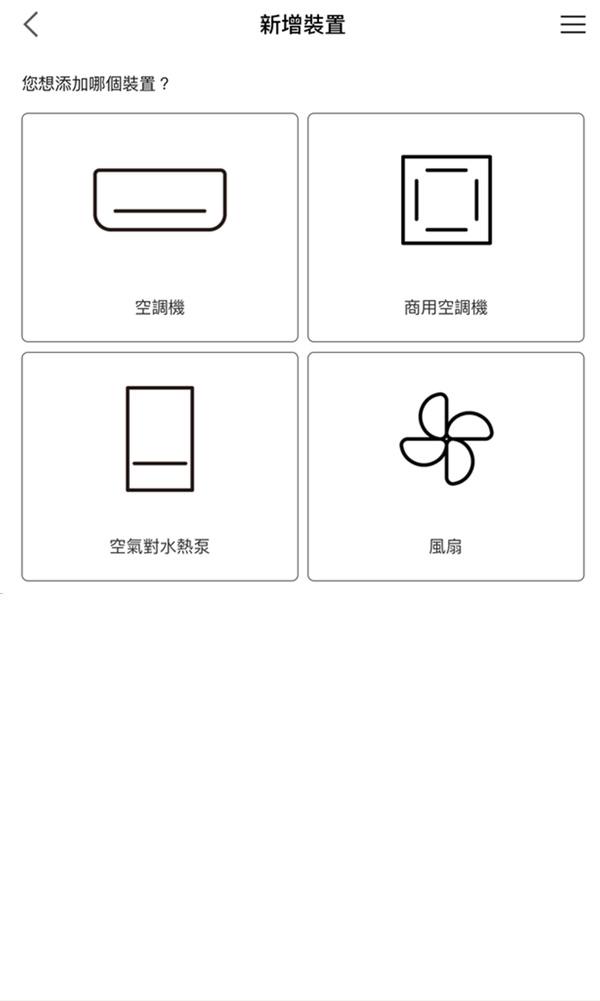
② Choose "Air conditioner".
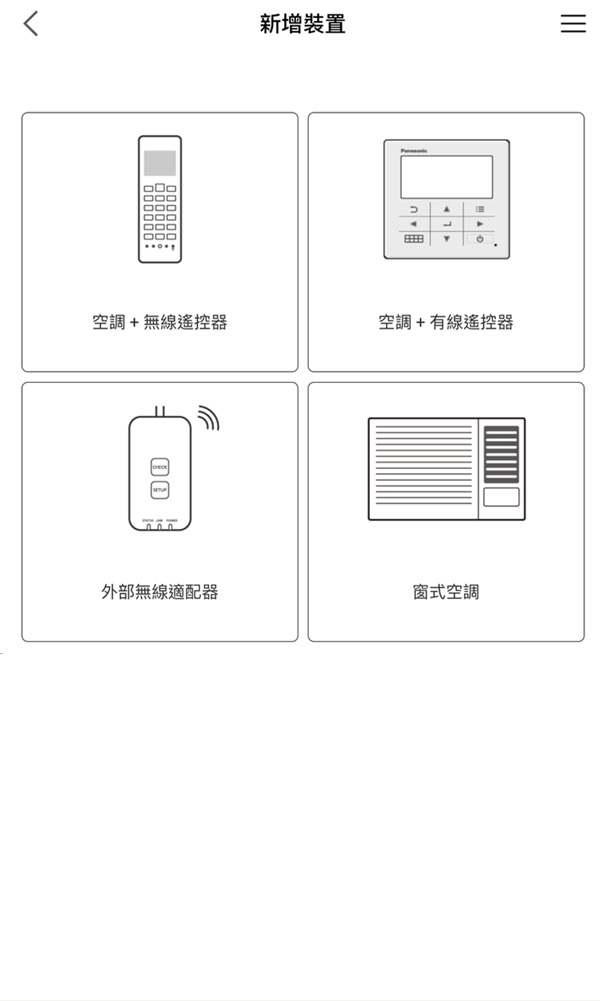
③ Choose "Air conditioner + Wireless remote controller".
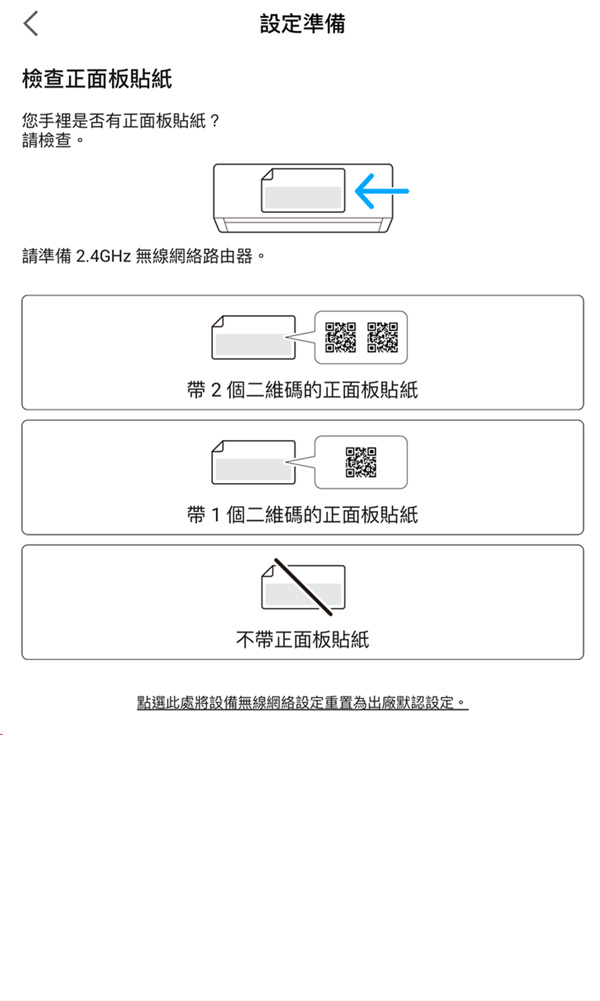
④ If there is no front panel sticker, tap "Without Front panel sticker".
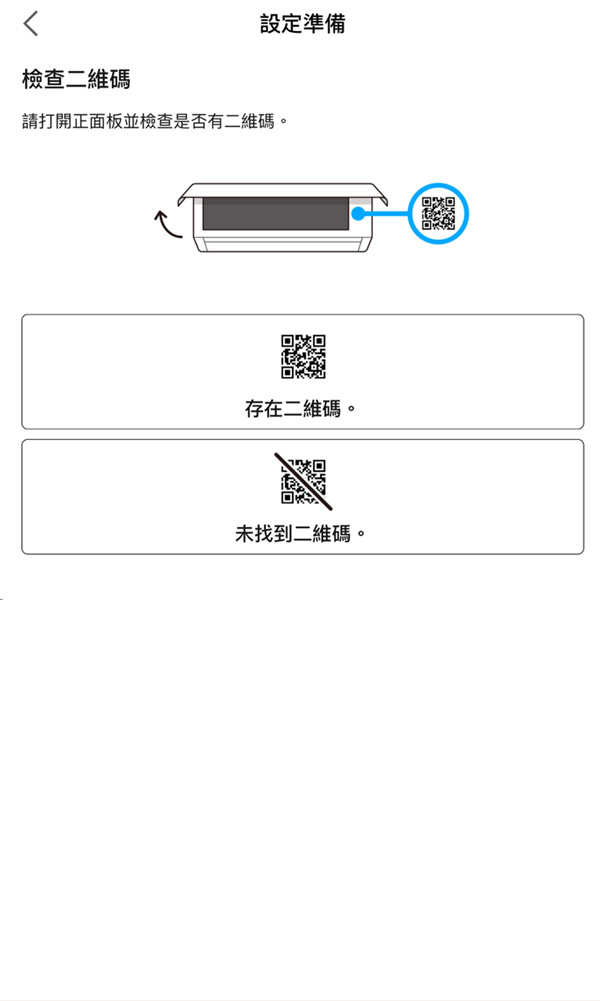
⑤ Check if there is 1 QR code inside the front panel, then tap "QR code exists".
⑥ Tap "Scan QR code".
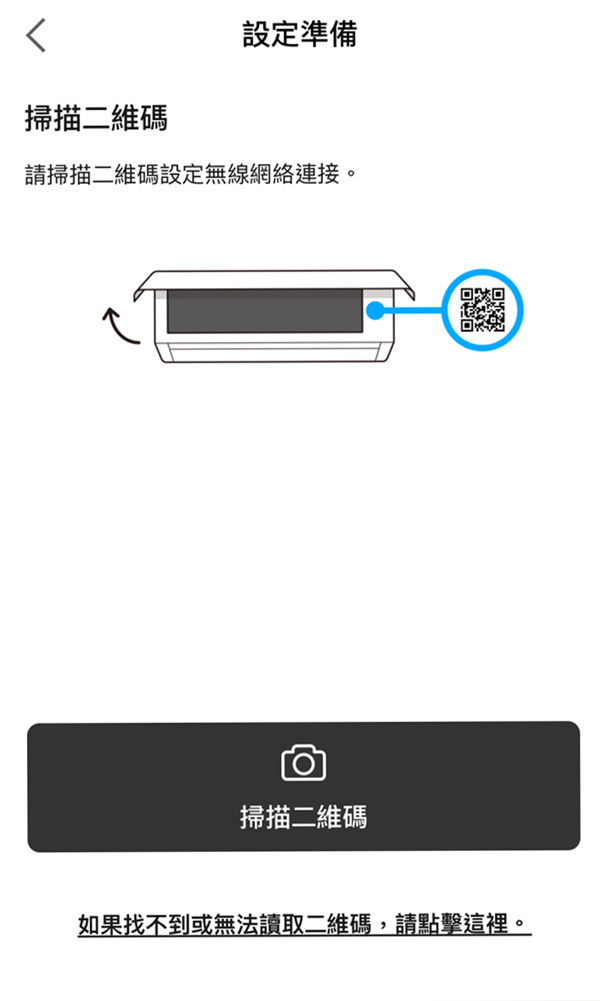
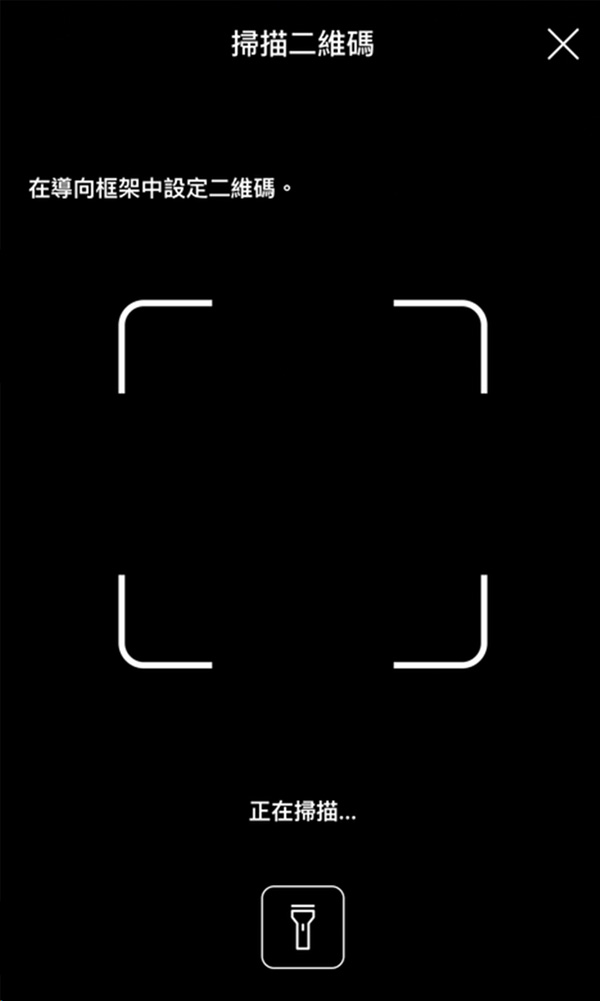
⑦ Scan the QR code on the front panel sticker or inside the front panel.
(Please ensure the application is granted permission to access the camera, connect to nearby devices, use Bluetooth, and access your precise location while in use.)
*Pop-up design may vary depending on the OS version and/or smartphone/tablet model.
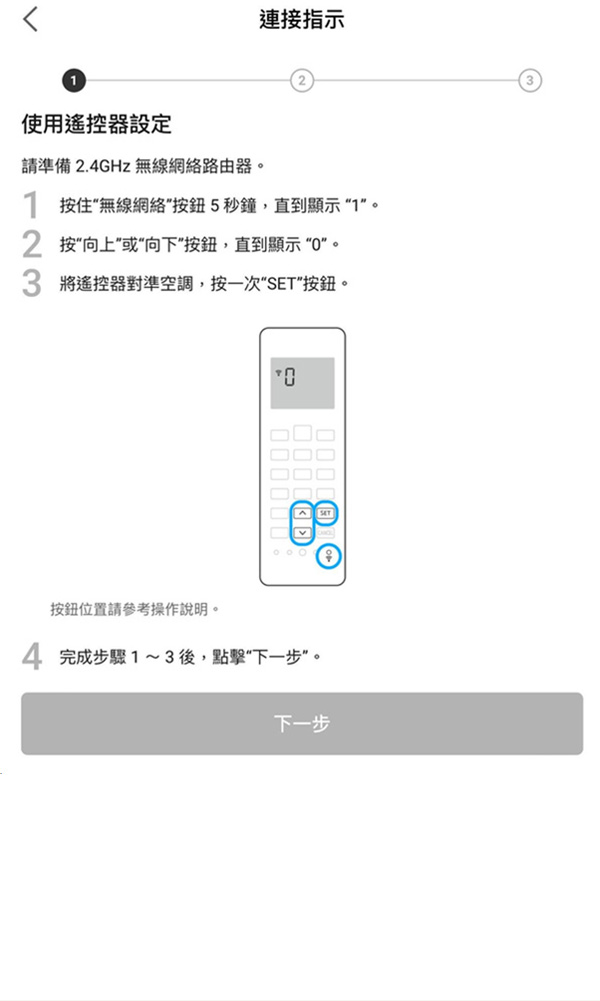
⑧ Set up using the air conditioner’s remote control and a pin.
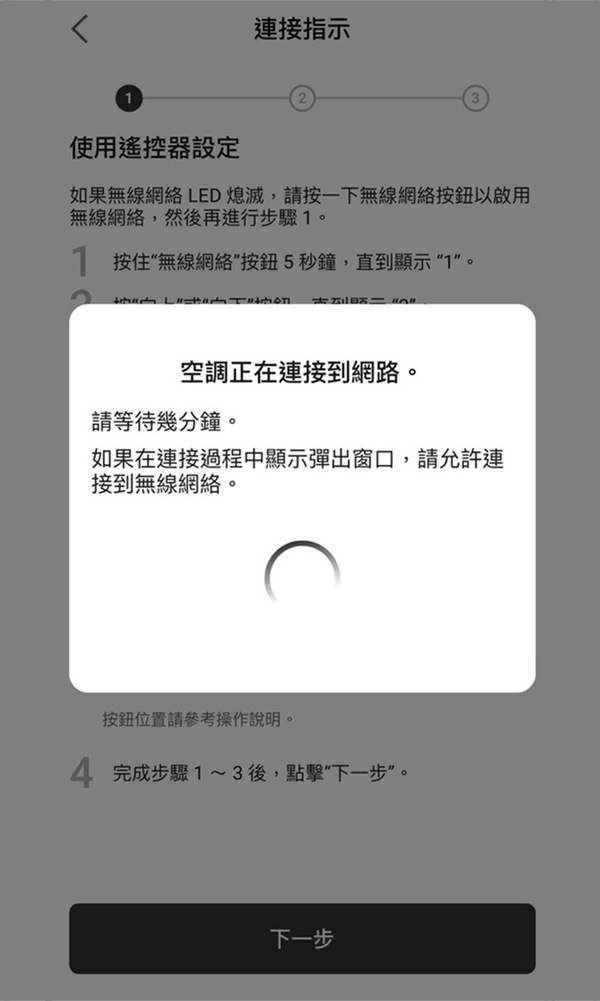
⑨ Your air conditioner is connecting to the network.
*This may take a few minutes. Please wait.
⑩ Choose to connect to the same Wireless LAN router your smartphone/tablet is connected to.
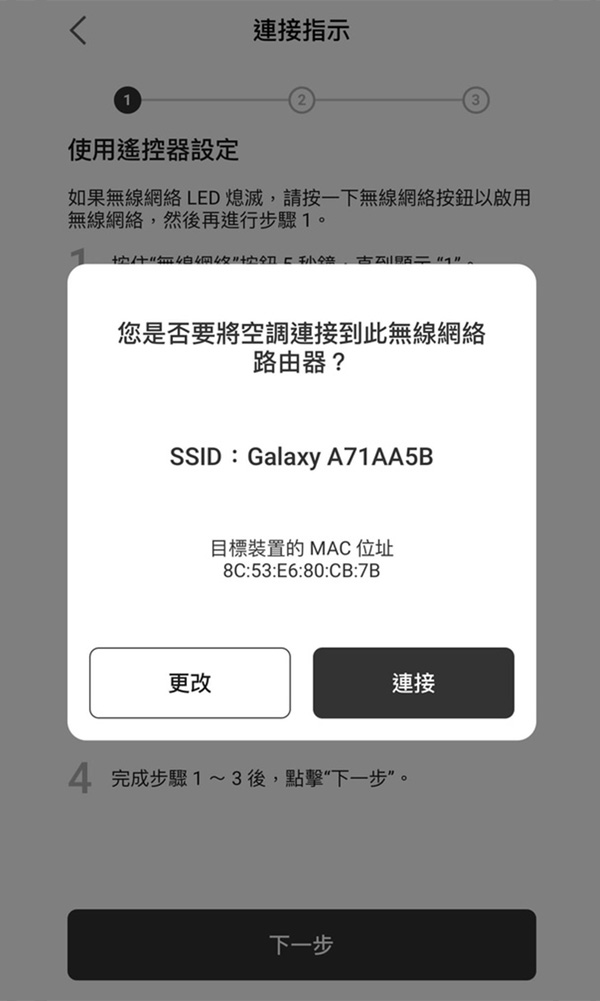
⑪ Create password and then tap "Register".
*As the first user, you need to create a new password for the air conditioner. This password will be required when adding an additional user.
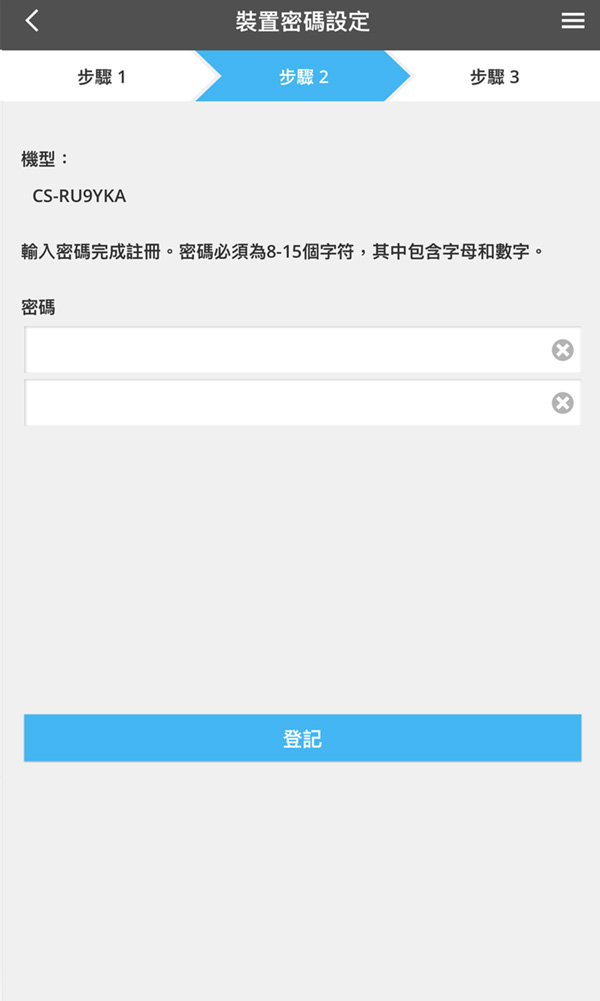
⑫ Set air conditioner name and then tap "Register".
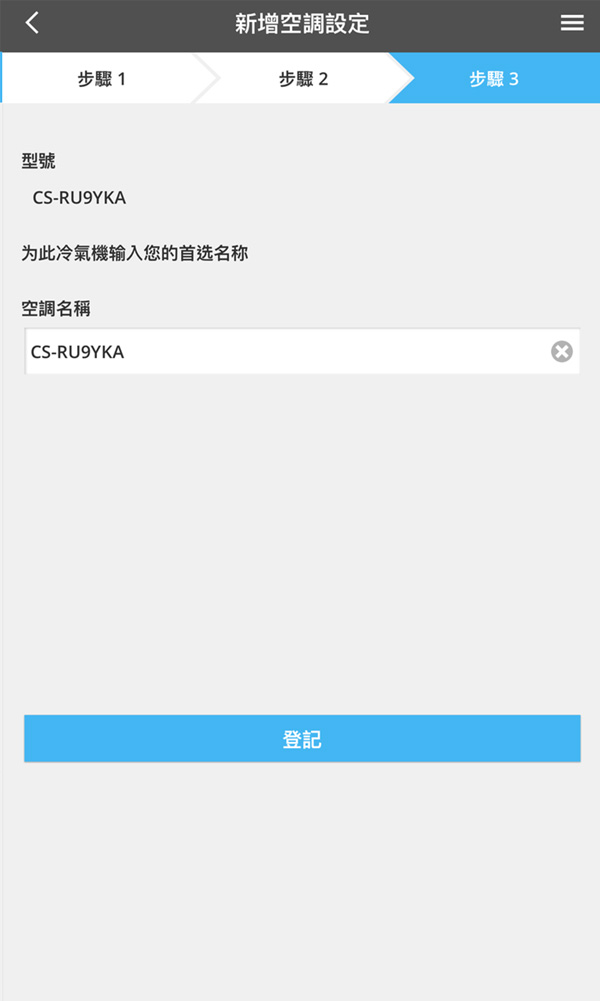
① Tap the "+" icon.
② Choose "Air conditioner".
③ Choose "Air conditioner + Wireless remote controller".
④ Ensure there are 2 QR codes on the front panel's sticker, then tap "Front panel sticker with 2 QR codes"
⑤ Tap "Scan QR code".
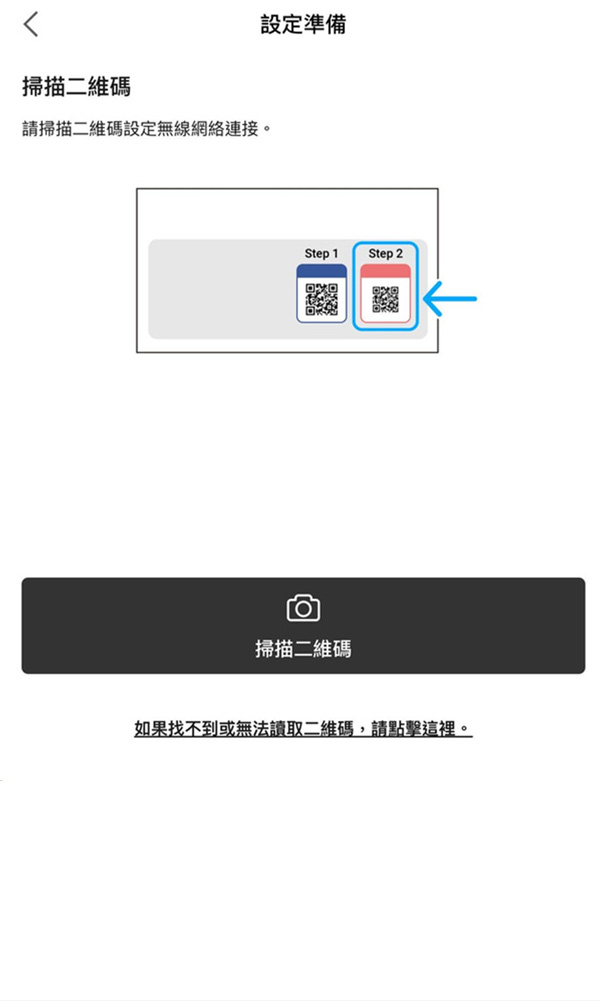
⑥ Scan the QR code on the front panel sticker or inside the front panel.
(Please ensure the application is granted permission to access the camera, connect to nearby devices, use Bluetooth, and access your precise location while in use.)
*Pop-up design may vary depending on the OS version and/or smartphone/tablet model.
⑦ Set up using the air conditioner's remote control and a pin.
⑧ Your air conditioner is connecting to the network.
*This may take a few minutes. Please wait.
⑨ Choose to connect to the same Wireless LAN router your smartphone/tablet is connected to.
⑩ Create password and then tap "Register".
*As the first user, you need to create a new password for the air conditioner. This password will be required when adding an additional user.
⑪ Set air conditioner name and then tap "Register".
Residential Standard Built-In Wi-Fi
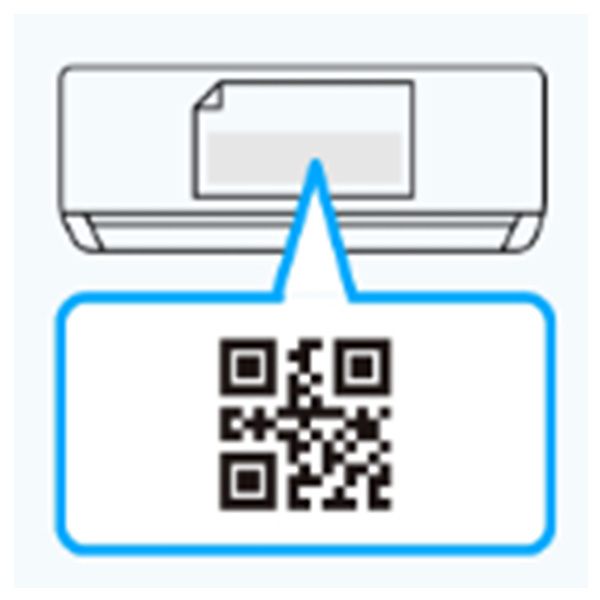
Model with Single QR code on the front panel sticker
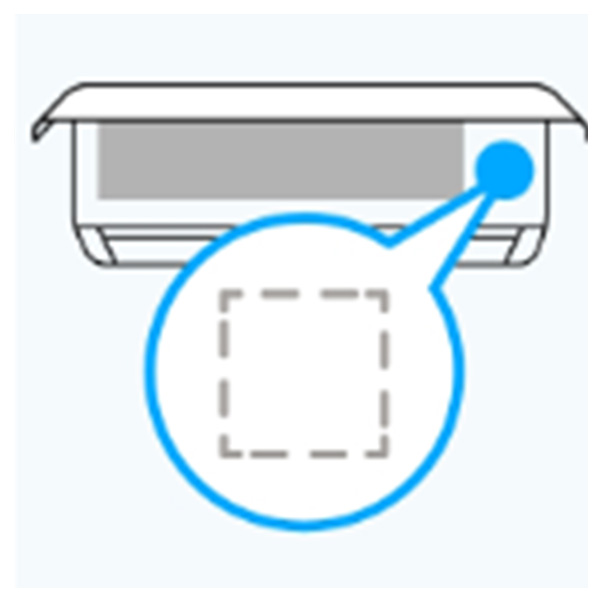
No QR code inside the front panel
① Tap the "+" icon.
② Choose "Air conditioner".
③ Choose "Air conditioner + Wireless remote controller".
④ Ensure there is 1 QR code ONLY on the front panel's sticker, then tap "Front panel sticker with 1 QR code"
⑤ Set up using the air conditioner's remote control and a pin.
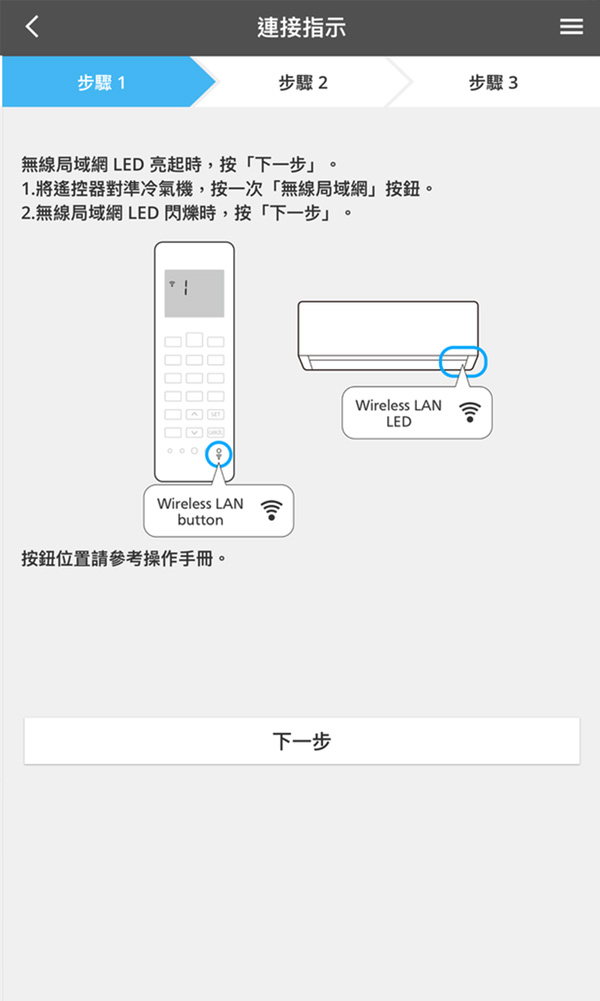
⑥ Tap "LED is blinking".
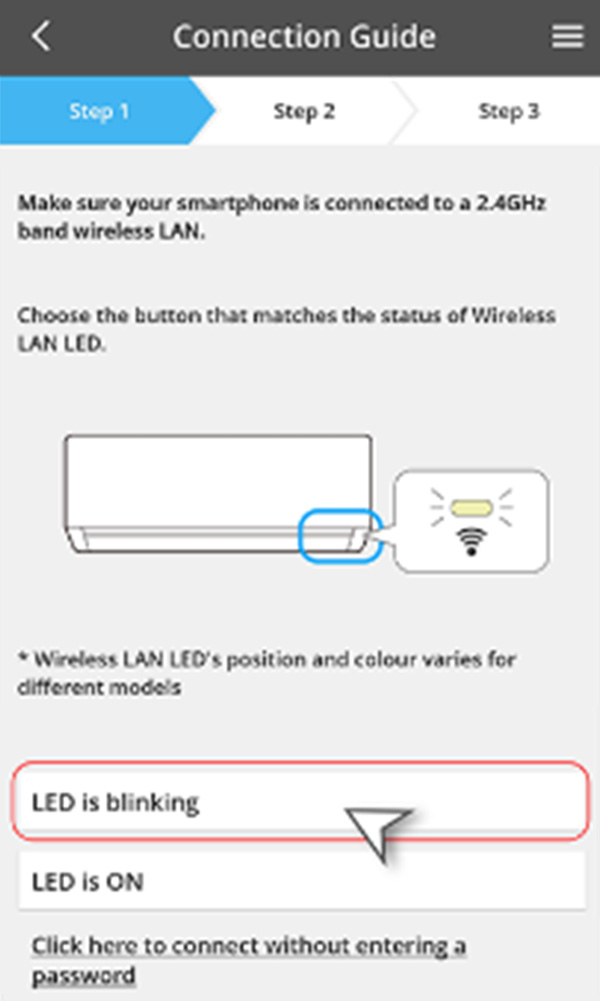
⑦ Set up using the air conditioner's remote control and a pin.
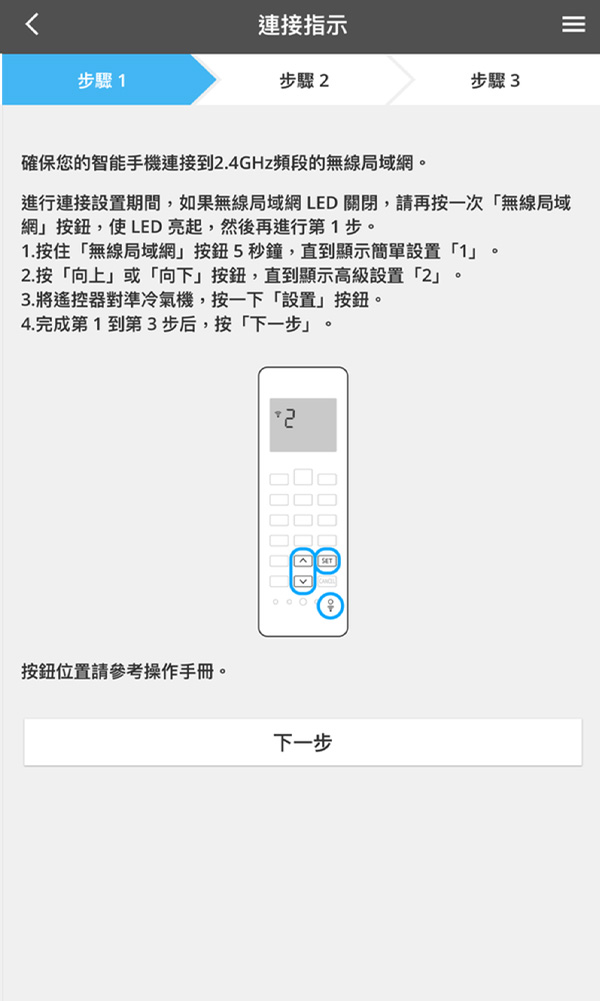
⑧ Tap "join"
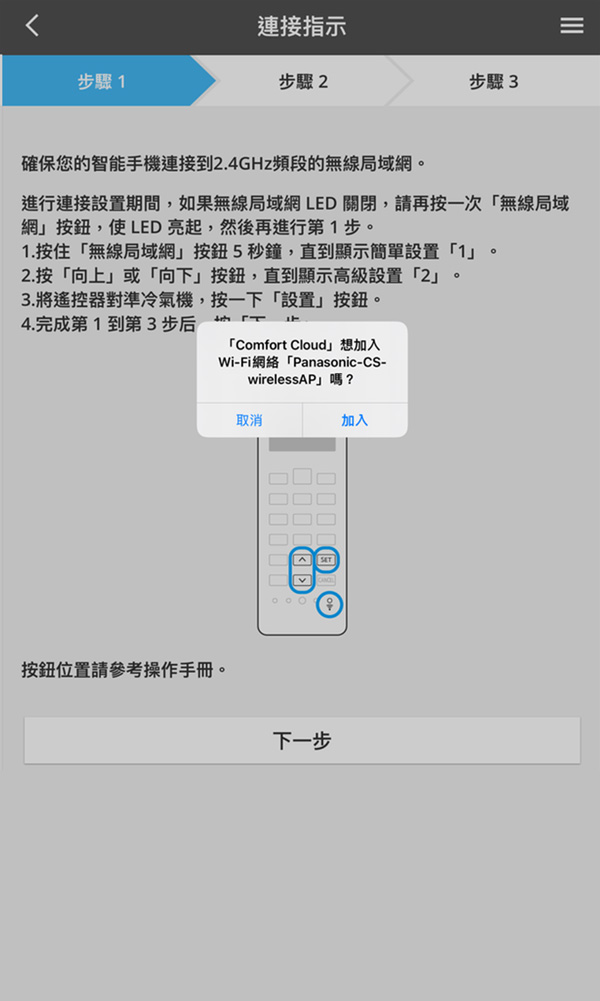
⑨ Please wait while the system searches for available air conditioners.
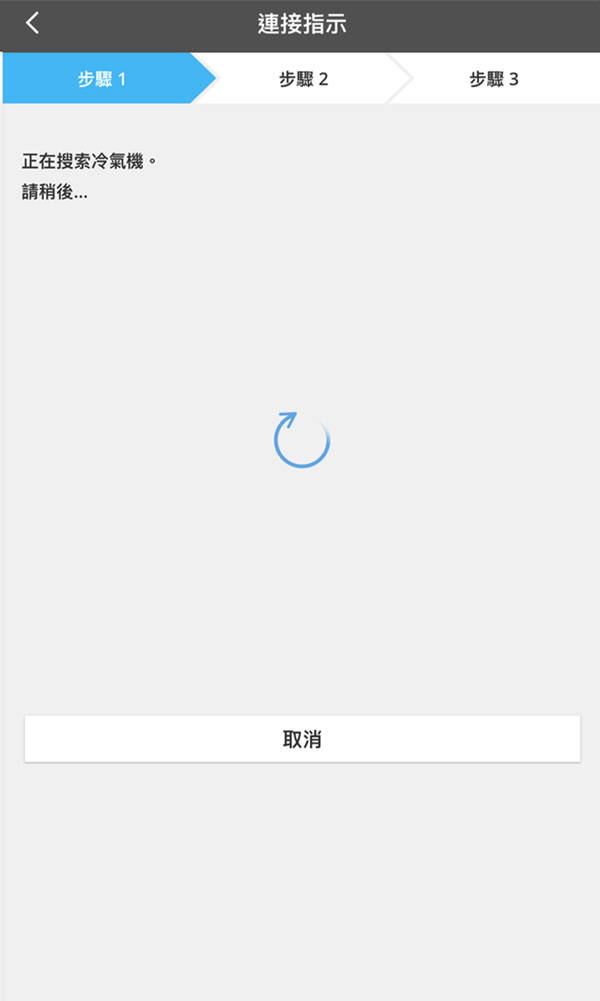
⑩ Select the air conditioner you wish to register.
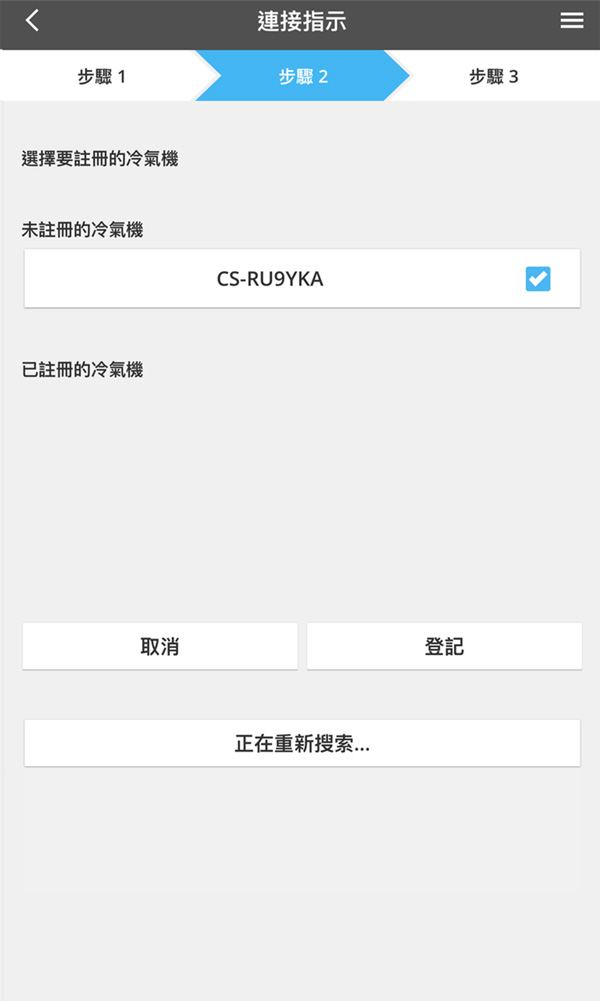
⑪ Create password and then tap "Register".
*As the first user, you need to create a new password for the air conditioner. This password will be required when adding an additional user.
⑫ Set air conditioner name and then tap "Register".
① Tap the "+" icon.
② Choose "Air conditioner".
③ Choose "Air conditioner + Wireless remote controller".
④ If there is no front panel sticker, tap "Without Front panel sticker".
⑤ Check if there is NO QR code inside the front panel, then tap "QR code is not found".
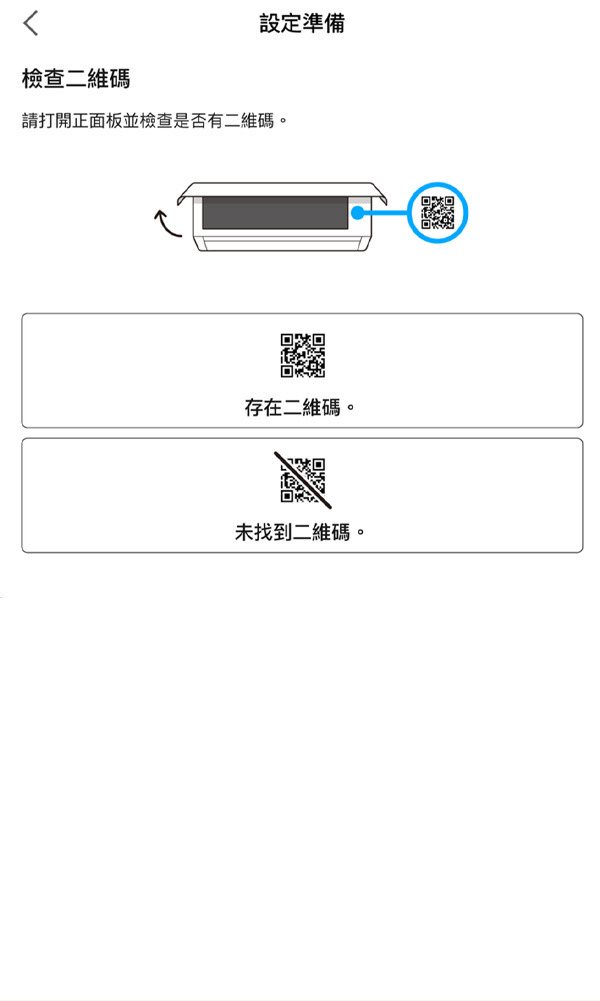
⑥ Set up using the air conditioner’s remote control and a pin.
⑦ Tap "LED is blinking".
⑧ Set up using the air conditioner's remote control and a pin.
⑨ Tap "join"
⑩ Please wait while the system searches for available air conditioners.
⑪ Select the air conditioner you wish to register.
⑫ Create password and then tap "Register".
*As the first user, you need to create a new password for the air conditioner. This password will be required when adding an additional user.
⑬ Set air conditioner name and then tap "Register".
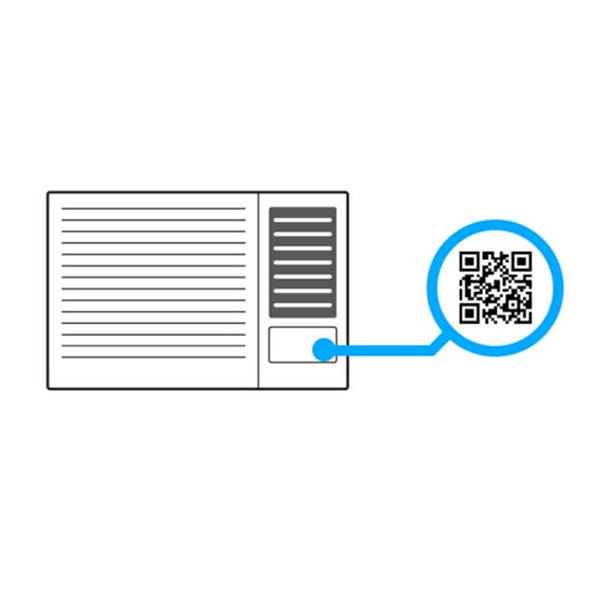
Model with QR code on the front panel sticker
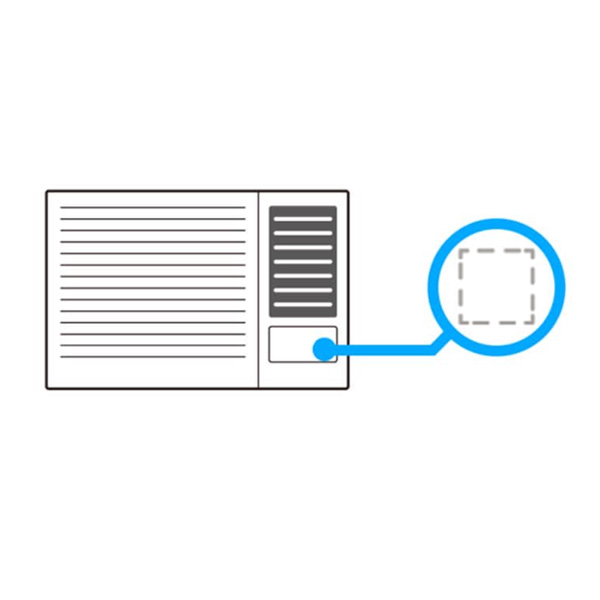
No QR code on the front panel
① Tap the "+" icon.
② Choose "Air conditioner".
③ Choose "Air conditioner + Wireless remote controller".
④ Tap "QR code exists".
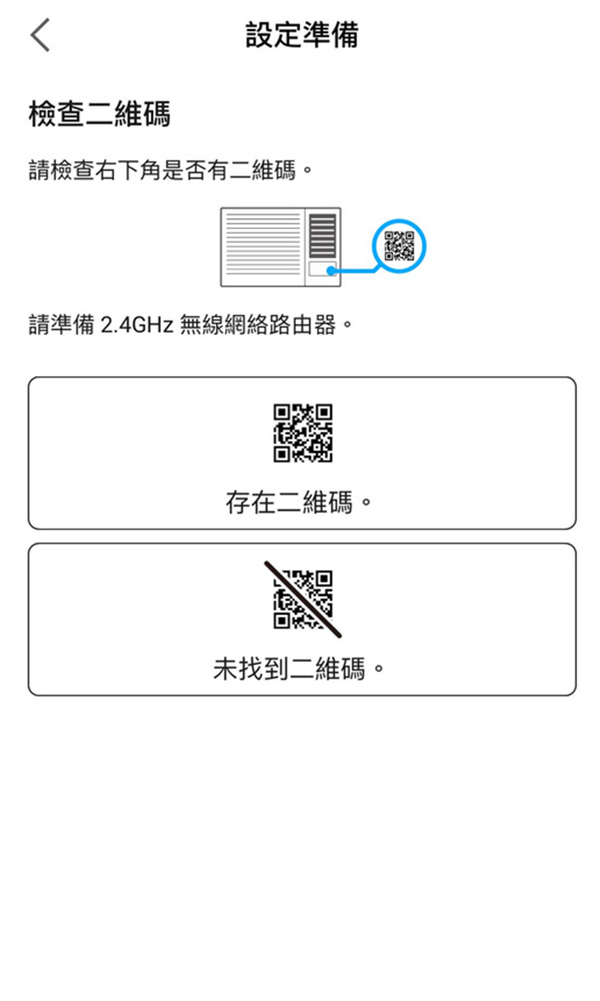
⑤ Tap "Scan QR code".
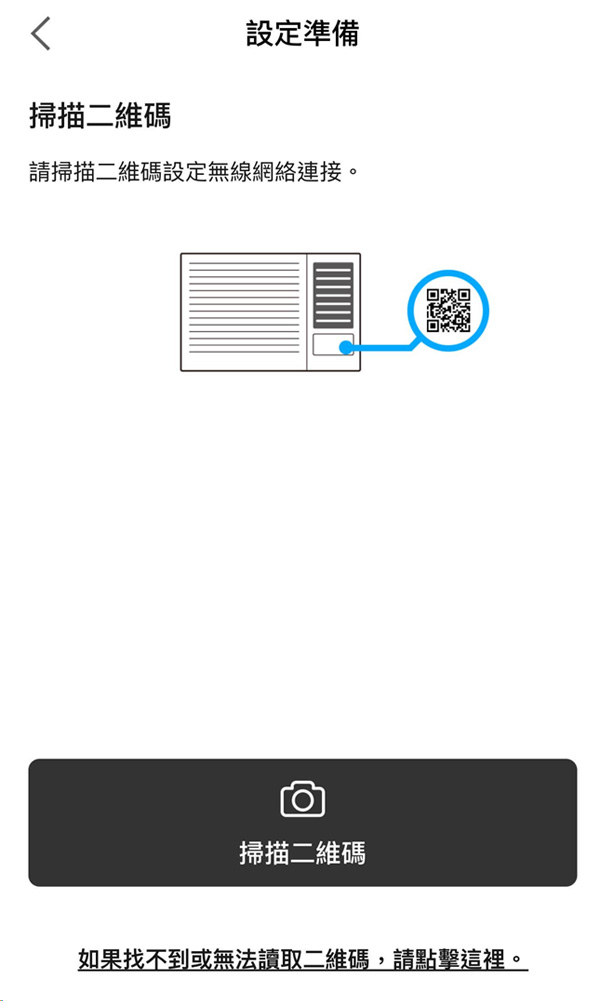
⑥ Scan the QR code on the front panel sticker or inside the front panel.
(Please ensure the application is granted permission to access the camera, connect to nearby devices, use Bluetooth, and access your precise location while in use.)
*Pop-up design may vary depending on the OS version and/or smartphone/tablet model.
⑦ Set up using the air conditioner’s remote control and a pin.
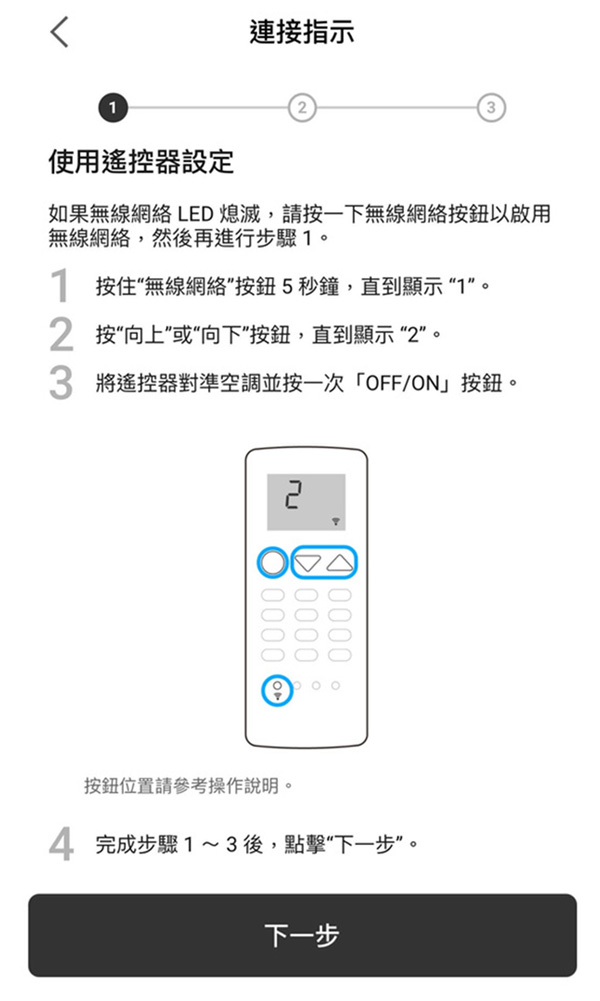
⑧ Your air conditioner is connecting to the network.
*This may take a few minutes. Please wait.
⑨ Choose to connect to the same Wireless LAN router your smartphone/tablet is connected to.
⑩ Create password and then tap "Register".
*As the first user, you need to create a new password for the air conditioner. This password will be required when adding an additional user.
⑪ Set air conditioner name and then tap "Register".
① Tap the "+" icon.
② Choose "Air conditioner".
③ Choose "Window type air conditioner"
④ Tap "QR code does not exists".
⑤ Set up using the air conditioner's remote control and a pin.
⑥ Your air conditioner is connecting to the network.
*This may take a few minutes. Please wait.
⑦ Choose to connect to the same Wireless LAN router your smartphone/tablet is connected to.
⑧ Create password and then tap "Register".
*As the first user, you need to create a new password for the air conditioner. This password will be required when adding an additional user.
⑨ Set air conditioner name and then tap "Register".